Android Studio makes it easy to create Android apps for several form factors, such as phone, tablet, TV, Wear, and Google Glass. The New Project wizard lets you choose the form factors for your app and populates the project structure with everything you need to get started.
Follow the steps in this section to create a project in Android Studio.
Step 1: Create a New Project
If you didn't have a project opened, Android Studio shows the Welcome screen. To create a new project, click New Project .
If you had a project opened, Android Studio shows the development environment. To create a new project, click File > New Project .
The next window lets you configure the name of your app, the package name, and the location of your project.
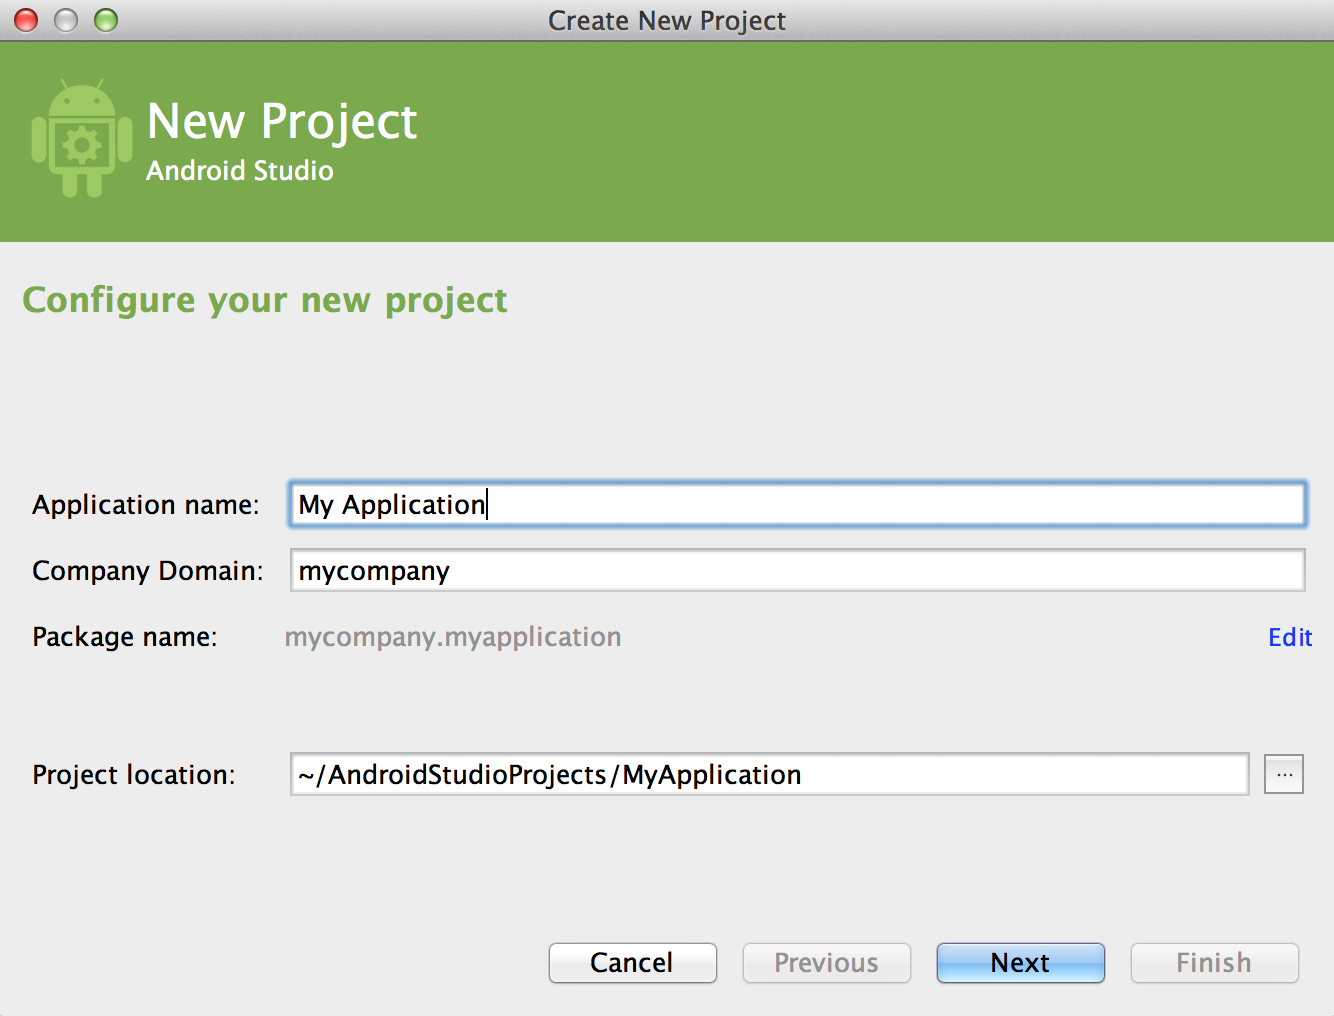
Figure 1. Choose a name for your project.
Enter the values for your project and click Next .
Step 2: Select Form Factors and API Level
The next window lets you select the form factors supported by your app, such as phone, tablet, TV, Wear, and Google Glass. For each form factor, you can also select the API Level that your app requires. To get more information, click Help me choose .
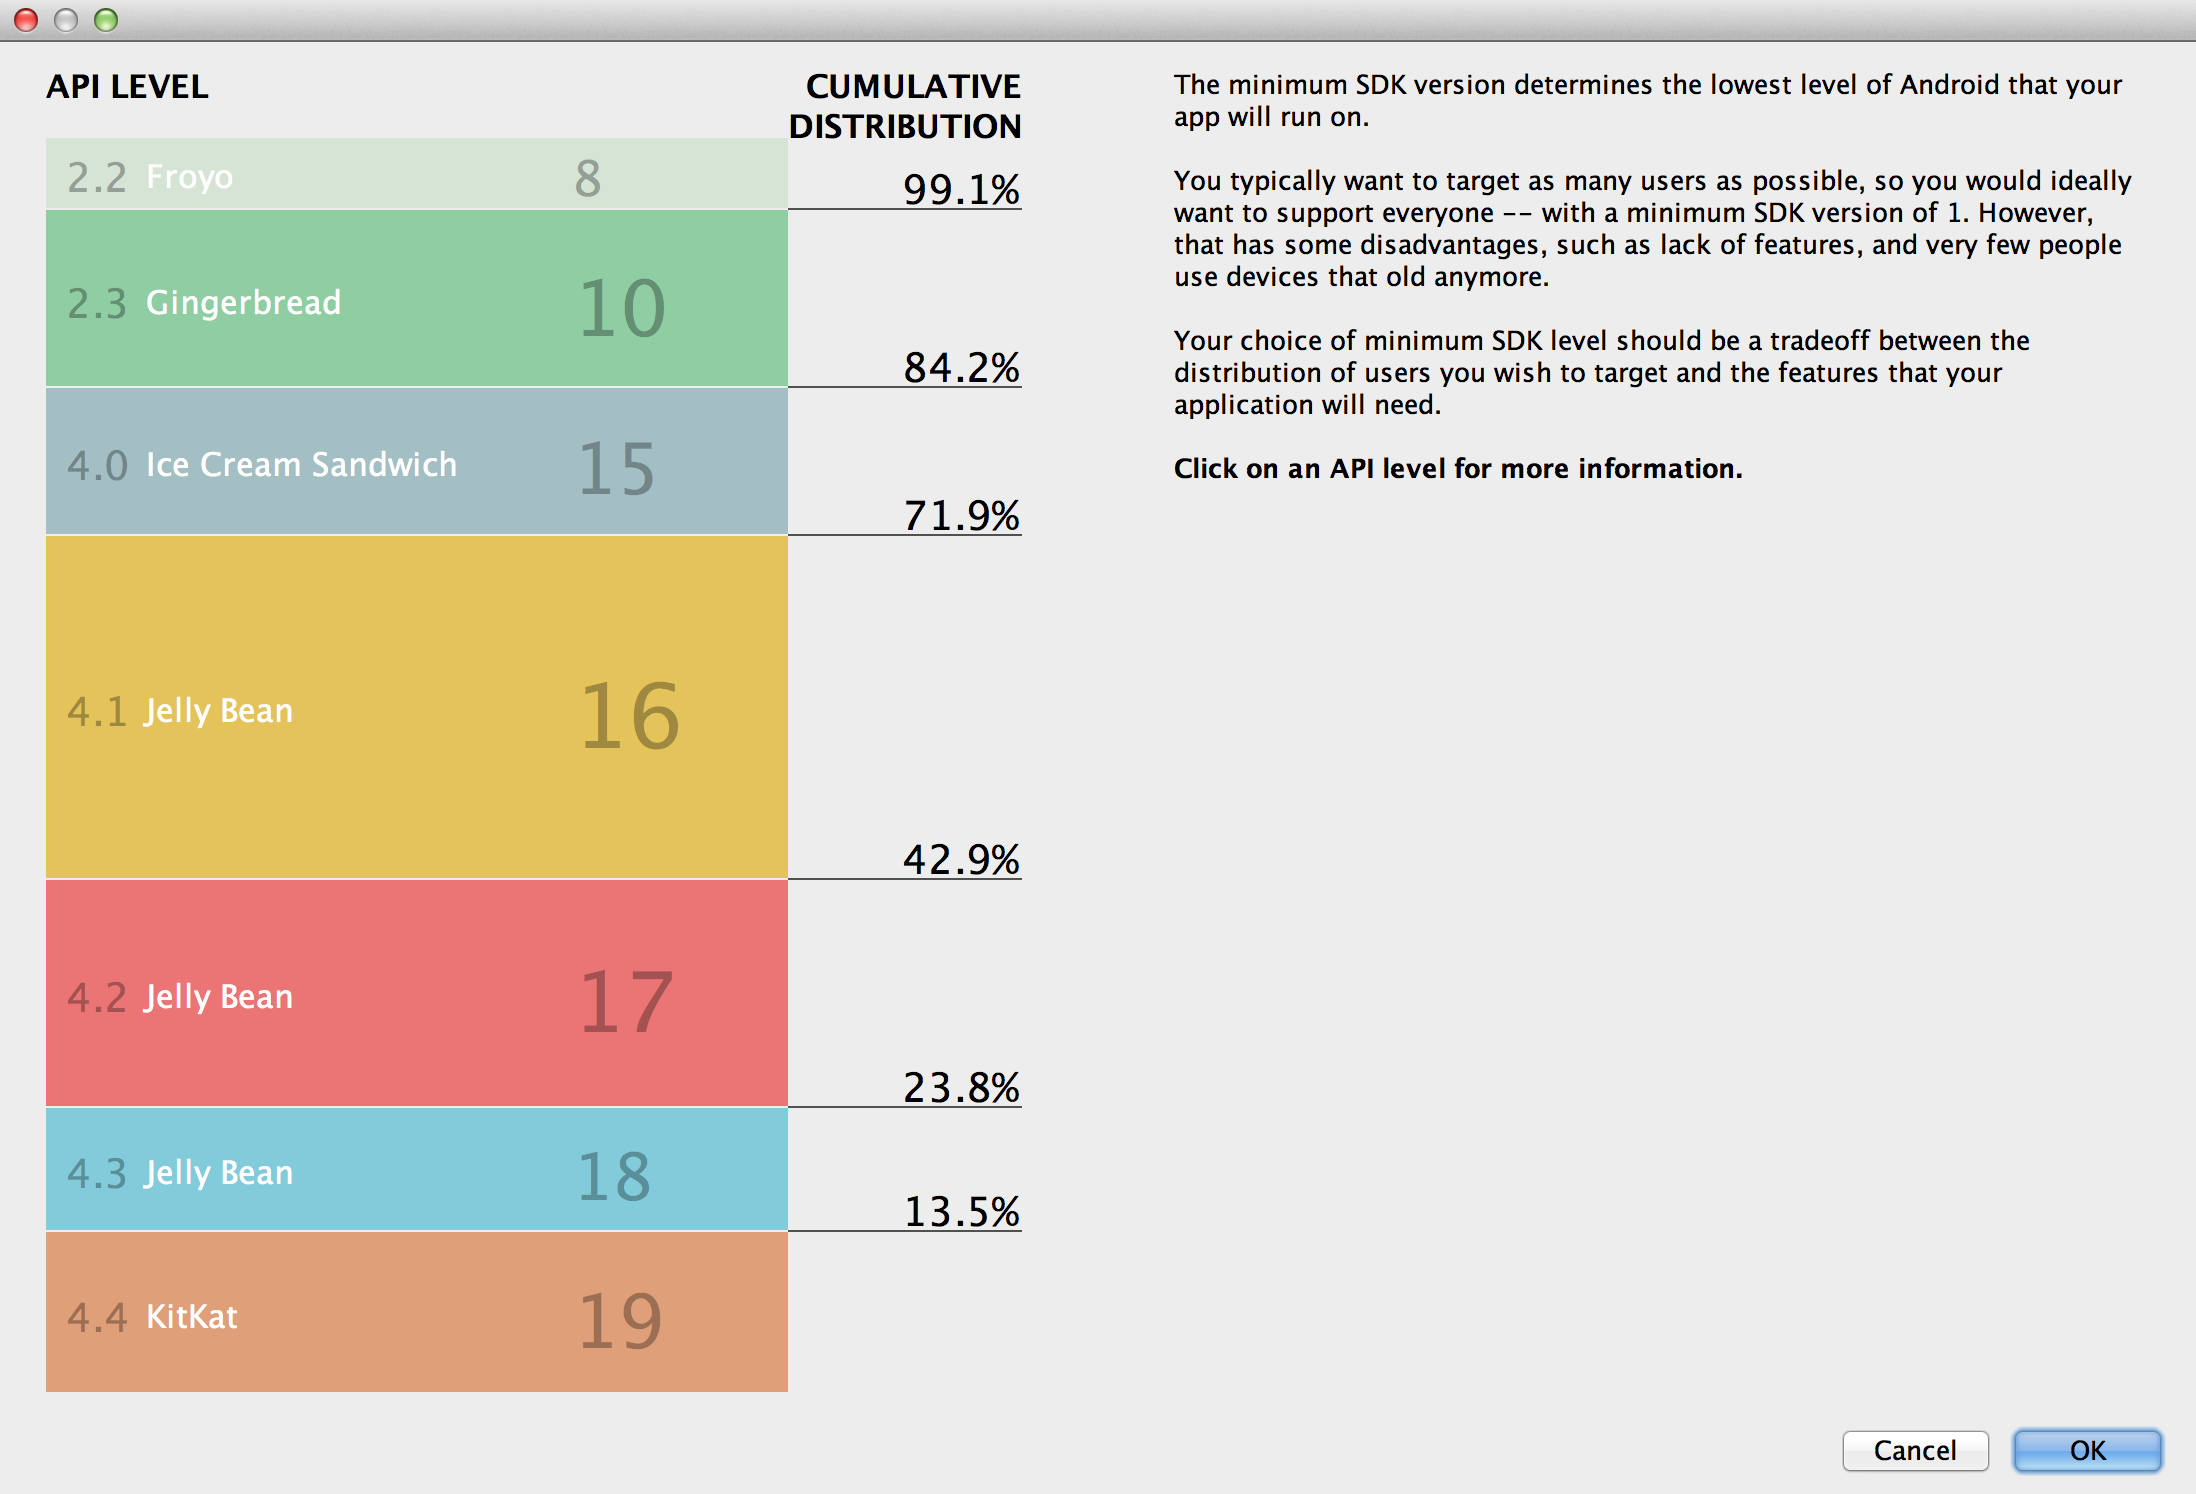
Figure 2. Select the API Level.
The API Level window shows the distribution of mobile devices running each version of Android, as shown in Figure 2. Click on an API level to see a list of features introduced in the corresponding version of Android. This helps you choose the minimum API Level that has all the features that your apps needs, so you can reach as many devices as possible. Then click OK .
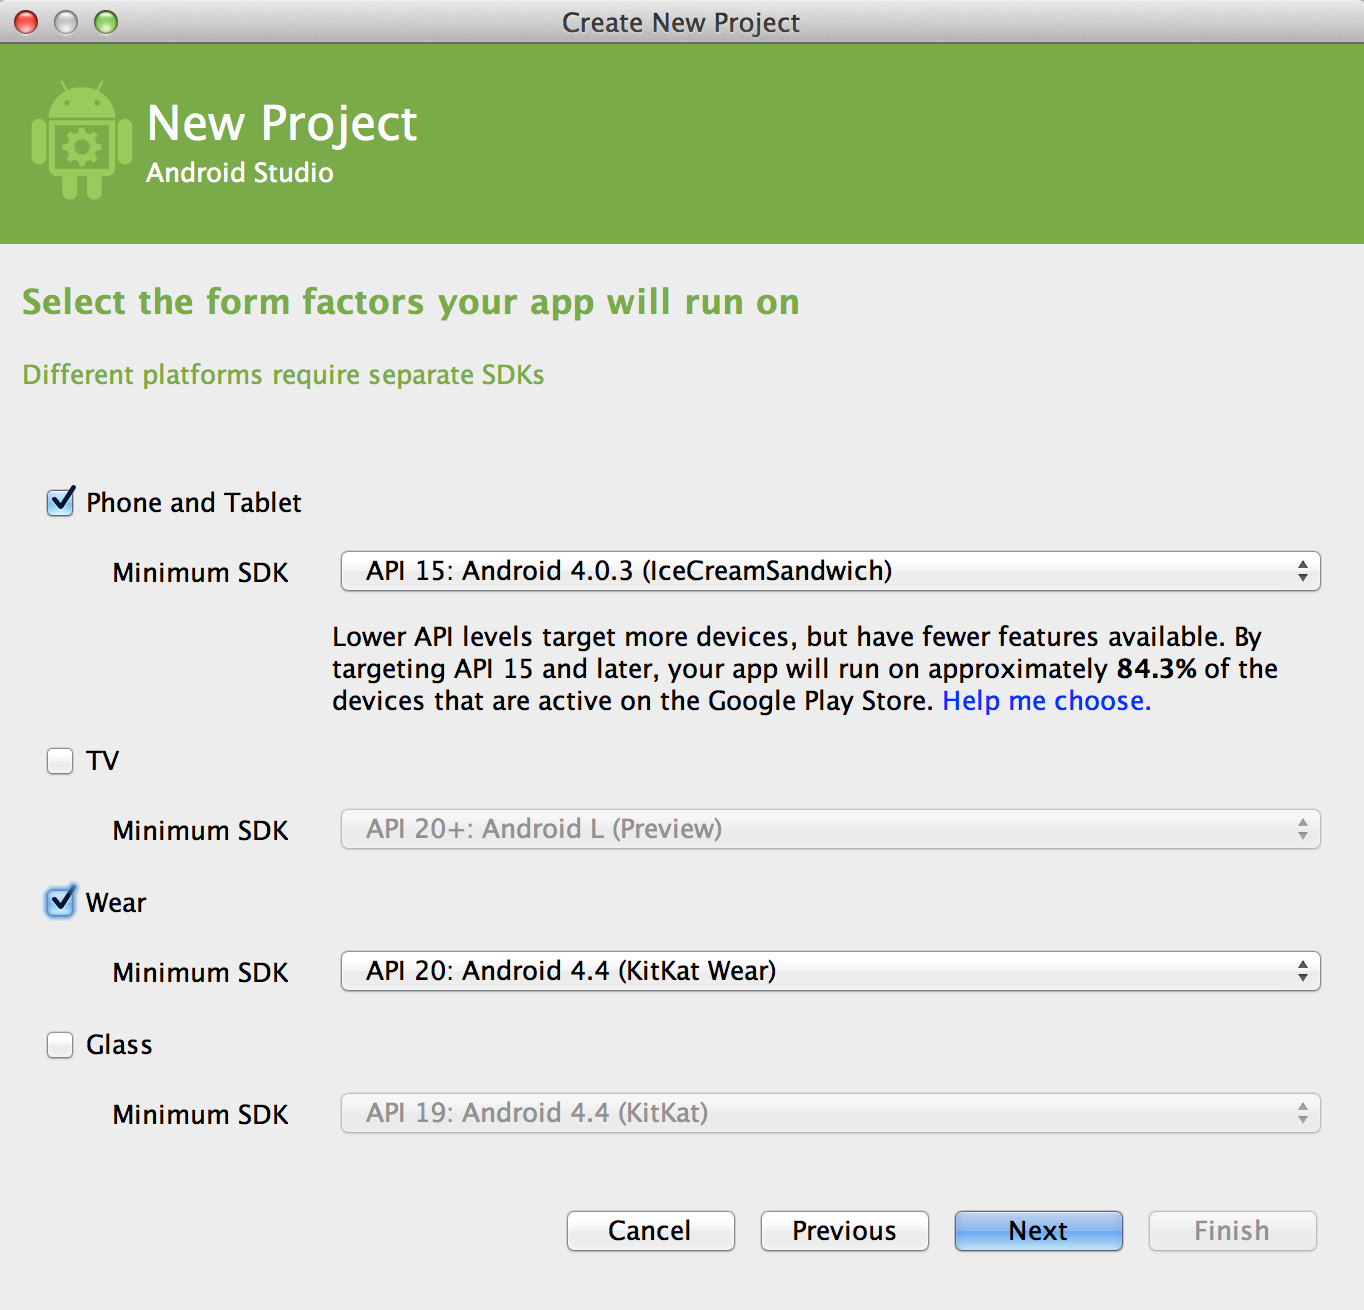
Figure 3. Choose form factors for your app.
Then, on the Form Factors Window, click Next .
Step 3: Add an Activity
The next screen lets you select an activity type to add to your app, as shown in Figure 4. This screen depends on the form factors you selected earlier.
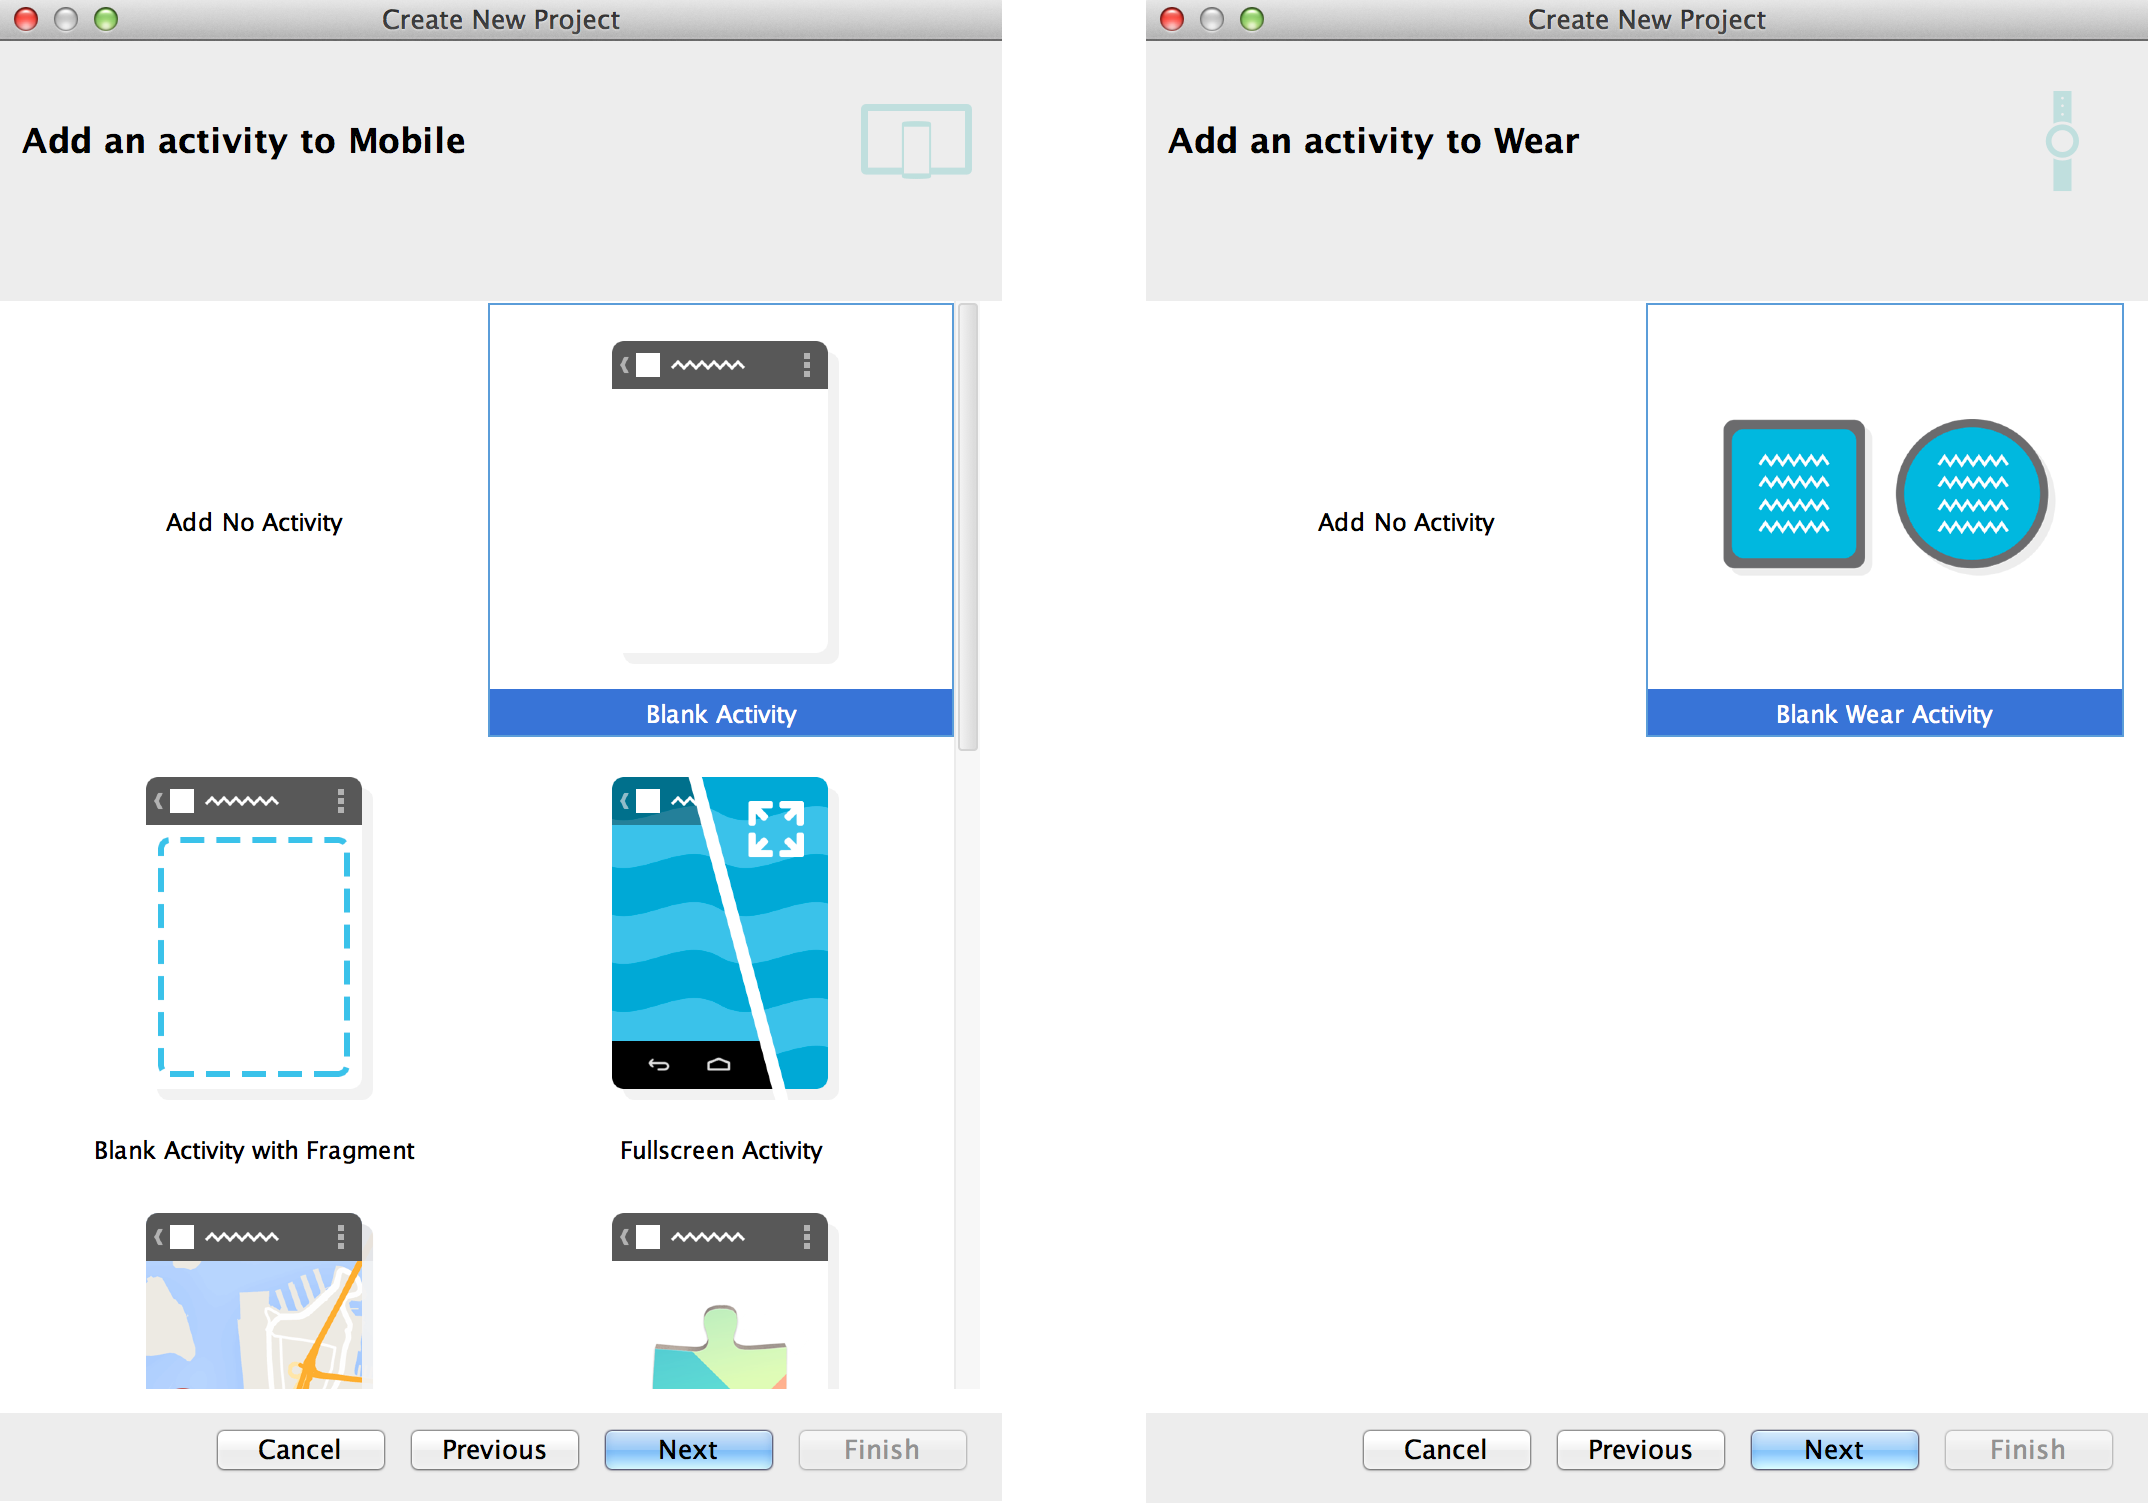
Figure 4. Add an activity to your app.
Choose an activity type and click Next .
Step 4: Configure Your Activity
The next screen lets you configure the activity to add to your app, as shown in Figure 6.
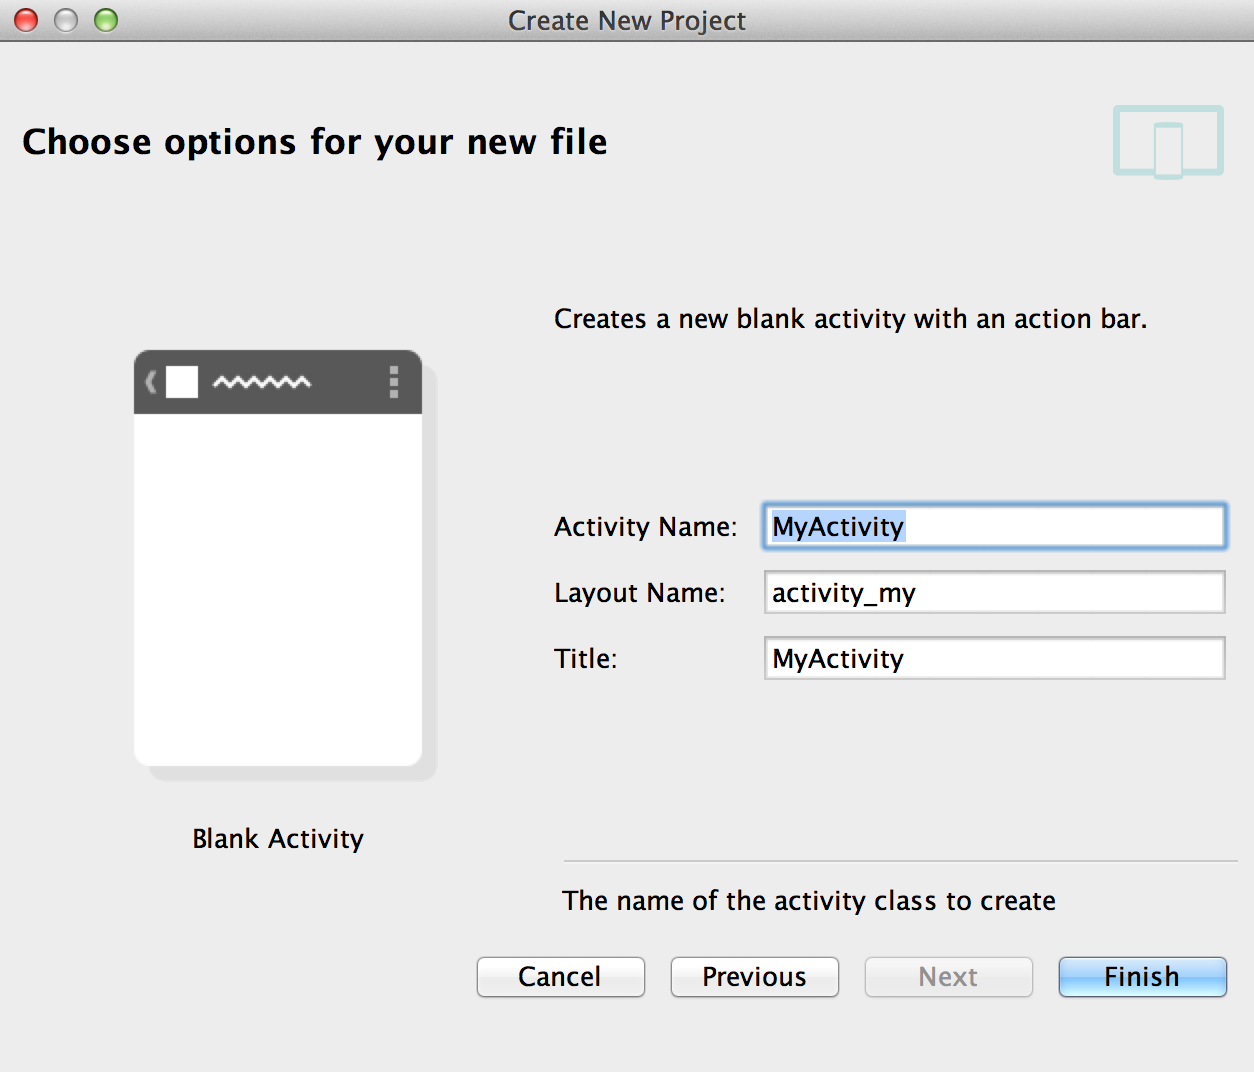
Figure 6. Choose a name for your activity.
Enter the activity name, the layout name, and the activity title. Then click Finish .
Step 5: Develop Your App
Android Studio creates the default structure for your project and opens the development environment. If your app supports more than one form factor, Android Studio creates a module for each of them, as shown in Figure 7.
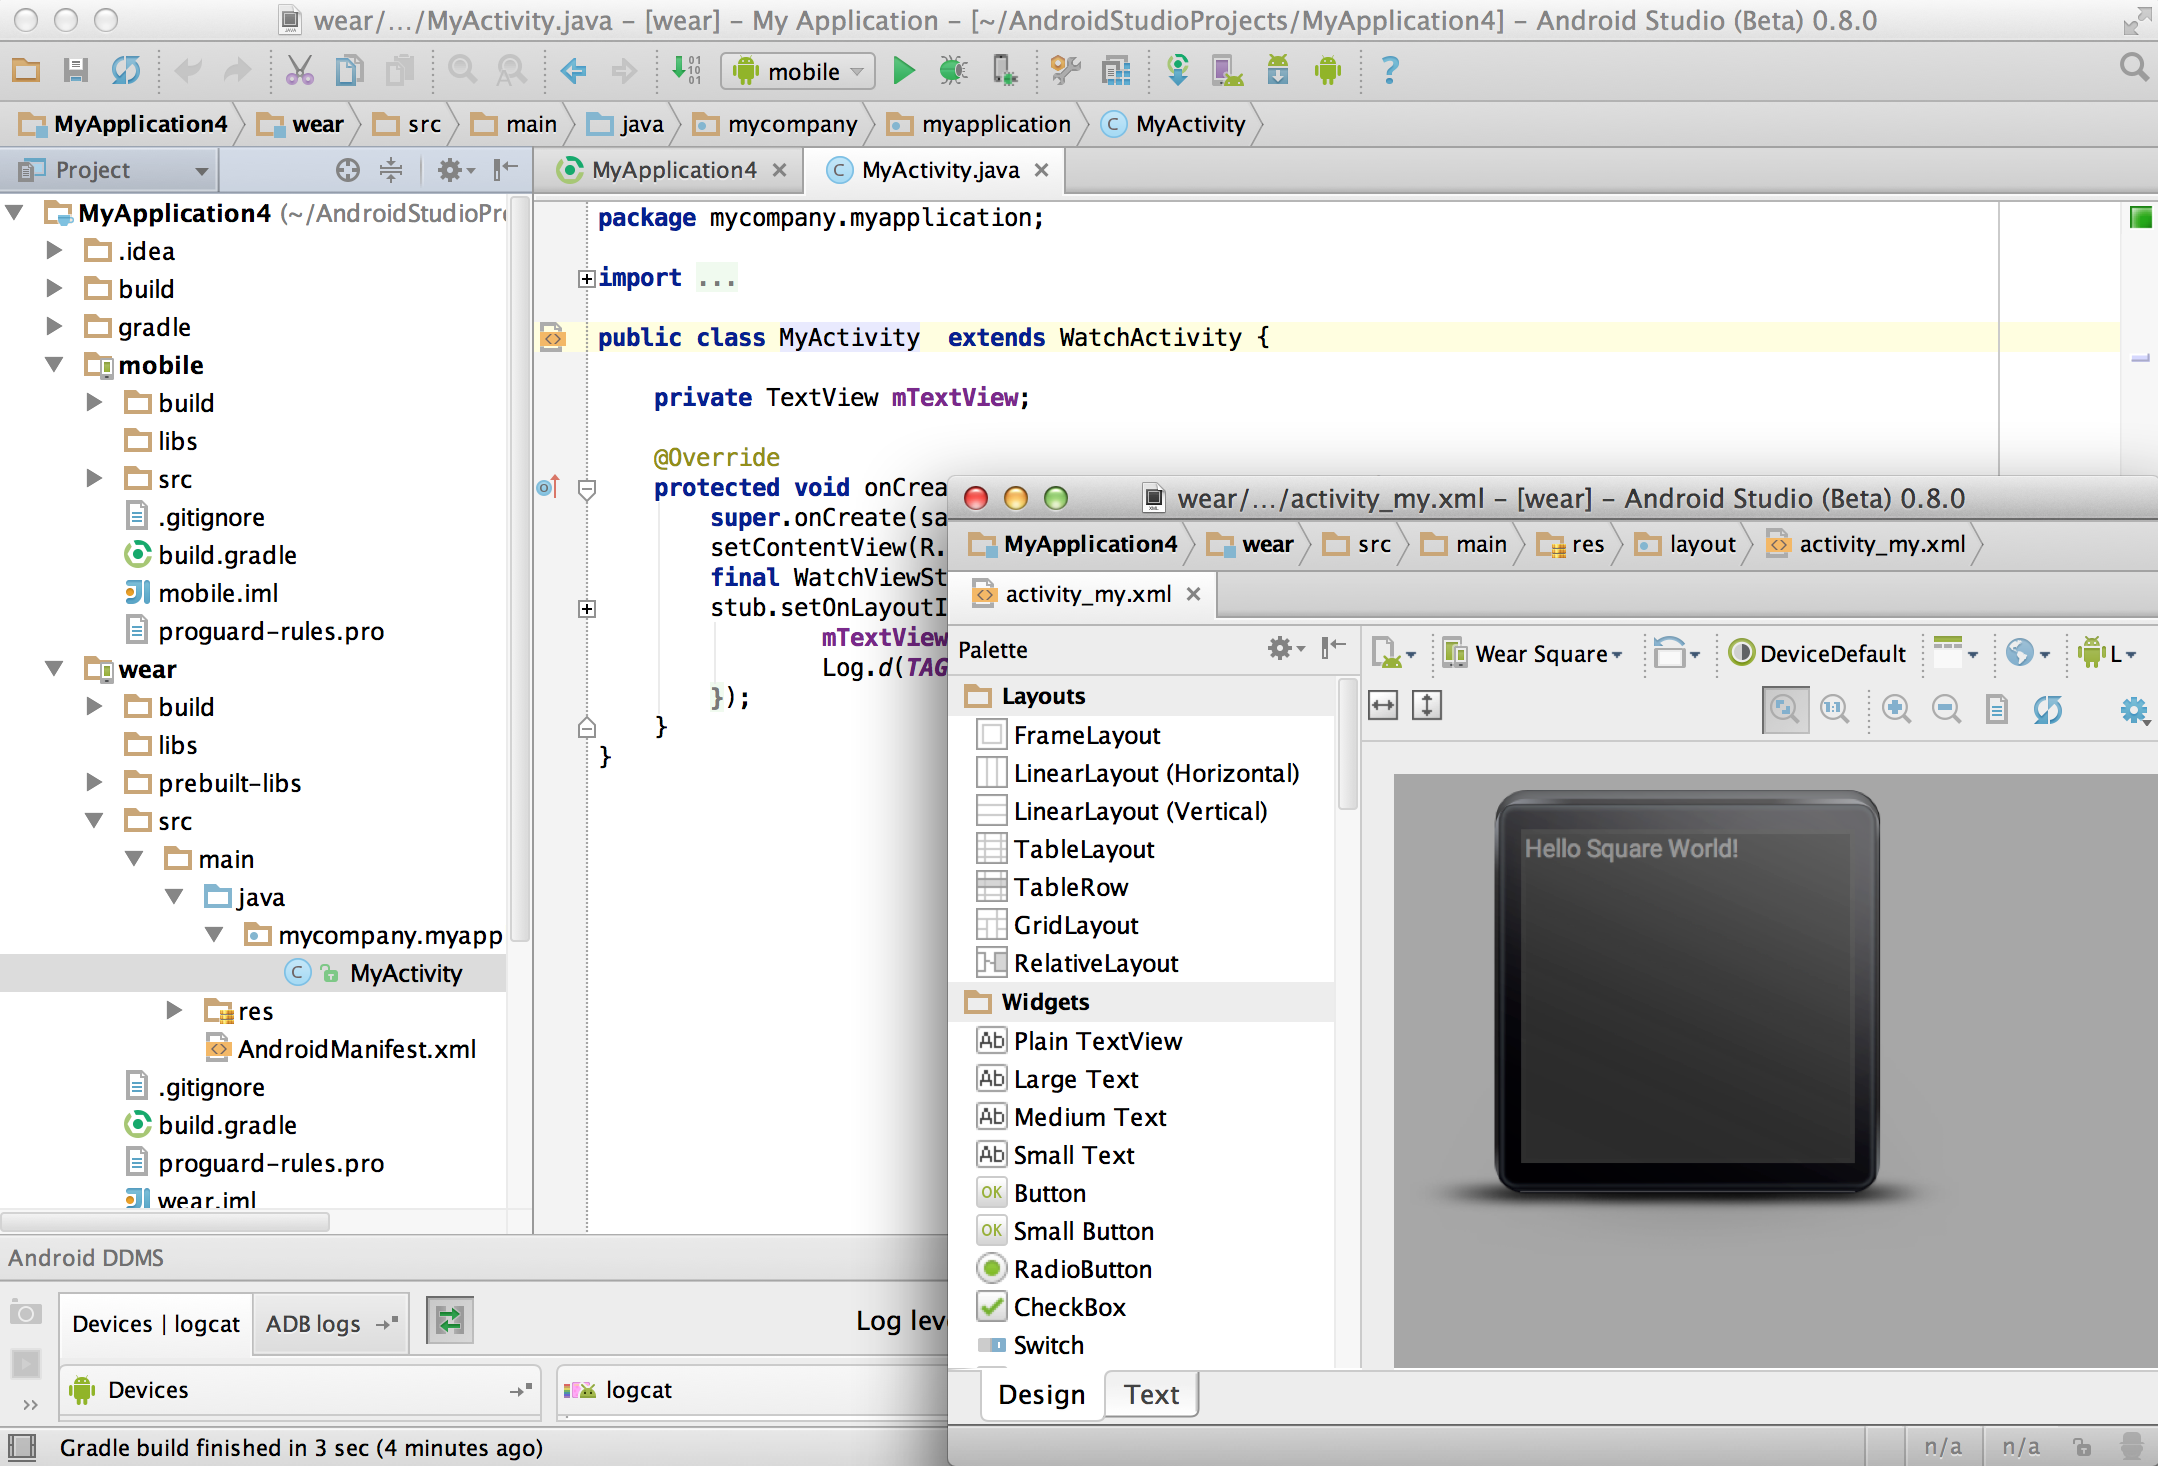
Figure 7. The default project structure for a mobile app.
Now you are ready to develop your app. Fore more information, see the following links: