It's easy to use the Eclipse development environment to develop your Java App Engine application, just as you can to develop any other servlet-based web application. With the Google Plugin for Eclipse, it's even easier. The plugin lets you create, test, and upload App Engine applications from within Eclipse. You can also import an App Engine application packaged as a Maven project, and let Eclipse use Maven to manage dependencies and builds. (For more information, see Using Apache Maven .)
The Google Plugin for Eclipse also makes it easy to develop applications using Google Web Toolkit (GWT), to run on App Engine or in any other environment.
This article describes how to install the Google Plugin for Eclipse, create or import a new App Engine project, and debug it using the development server running within Eclipse. The article also describes how to use the plugin to upload your project to App Engine.
For more information about the plugin, including how to use it for Google Web Toolkit projects, see the Google Plugin for Eclipse documentation .
- Getting Eclipse
- Installing the Google Plugin for Eclipse
- Creating a Project
- Importing a Maven Project
- Running the Project
- Uploading to Google App Engine
- Running the Command Line Tools
Getting Eclipse
The Eclipse IDE is available in several packages . The "Eclipse IDE for Java EE Developers" package includes all of the components you will need for web application development.
In addition to the Google Plugin for Eclipse, we recommend the Eclipse Web Tools Platform (WTP) plugins for web development. Among other things, WTP provides editing modes for JSP and HTML files.
Installing the Google Plugin for Eclipse
To use the plugin you must be running Java version 7 and a recent version of Eclipse . You can install the Google Plugin for Eclipse using the software update feature of Eclipse. Be sure to use the plugin that corresponds to your version of Eclipse. Follow the installation instructions provided at the links below or, if you are familiar with installing Eclipse plugins, you can simply paste the appropriate plugin link directly into Eclipse.
| Eclipse version | Installation instructions | Direct plugin link |
|---|---|---|
| Eclipse 4.4 (Luna) | Plugin for Eclipse 4.4 (Luna) | https://dl.google.com/eclipse/plugin/4.4 |
| Eclipse 4.3 (Kepler) | Plugin for Eclipse 4.3 (Kepler) | https://dl.google.com/eclipse/plugin/4.3 |
| Eclipse 3.8/4.2 (Juno) | Plugin for Eclipse 3.8/4.2 (Juno) | https://dl.google.com/eclipse/plugin/4.2 |
If you are looking for older versions of the plugin, click here .
If you are having trouble installing from the update sites (due to firewall issues, for instance), please see this FAQ entry .
As an alternative to installing from the update site, you can install the Google Plugin for Eclipse by downloading and installing an archive of the update site .
Creating a Project
To create a new App Engine project:
-
Select the
File
menu >
New
>
Web Application Project
(If you do not see this menu option, select the
Window
menu >
Reset Perspective...
, click
OK
, then try the
File
menu again.)
Alternatively, click the Google button
 in the Eclipse toolbar and select "New Web Application Project."
-
The "Create a Web Application Project" wizard opens. For "Project name," enter a name for your project, such as
Guestbookfor the project described in the Getting Started Guide . For "Package," enter an appropriate package name, such asguestbook. - If you're not using Google Web Toolkit , uncheck "Use Google Web Toolkit." Verify that "Use Google App Engine" is checked.
-
If you installed the App Engine SDK using Software Update, the plugin is already configured to use the SDKs that were installed. If you would like to use a separate installation of the App Engine SDK, click
Configure SDKs...
, and follow the prompts to add a configuration with your SDK's
appengine-java-sdk/directory. - Click Finish to create the project.
The wizard creates a directory structure for the project, including a
src/
directory for Java source files, and a
war/
directory for compiled classes and other files for the application, libraries, configuration files, static files such as images and CSS, and other data files. The wizard also creates a servlet source file and two configuration files. The complete directory structure looks like this:
Guestbook/
  src/
    guestbook/
      server/
        GuestbookServlet.java
    META-INF/
      jdoconfig.xml
    log4j.properties
    logging.properties
  war/
    WEB-INF/
      lib/
        ...App Engine JARs...
      appengine-web.xml
      web.xml
    index.html
The
war/
directory uses the
WAR
standard layout for bundling web applications. (WAR archive files are not yet supported by the SDK.) The Eclipse plugin uses this directory for running the development server, and for deploying the app to App Engine.
When Eclipse builds your project, it creates a directory named
classes/
in
war/WEB-INF/
, and puts compiled class files here. Eclipse also copies non-source files found in
src/
to
war/WEB-INF/classes/
, including
META-INF/
and the
log4j.properties
and
logging.properties
files. The final contents of the
war/
directory make up your application for testing and deployment.
For details about the new project that the plugin creates, see the Getting Started Guide .
Importing a Maven Project
An existing App Engine project that has been packaged as a Maven project can be imported as an
Eclipse project. The directory at the root of the Maven project must have a
pom.xml
file. The
<plugins>
element in the
pom.xml
file must include a
<plugin>
element for
appengine-maven-plugin
.
Note: The directory at the root of the Maven project must not contain any of the following:
-
A subdirectory named
target -
A subdirectory named
.settings -
A file named
.classpath -
A file named
.project
If any of these subdirectories or files exists, it should be removed manually before you import the project. The subdirectory of file will be created by the import process, but if it is present beforehand, it may interfere with the import process.
To import the existing App Engine project:
- Select the File menu > Import > Maven > Existing Maven Projects .
- Click Next .
-
Specify the root directory of the Maven project (the directory containing the
pom.xmlfile). You can either type the path into the Root Directory text field or click the Browse button and use a file-selection dialog. - Click Finish .
Running the Project
The App Engine SDK includes a web server for testing your application in a simulated environment. The Google Plugin for Eclipse adds new items to the Run menu for starting this server. The items added, and the details for using them, depend on whether you are using a Maven project:
- If your project is not a Maven project, you can run your application in the web server inside the Eclipse debugger by selecting the Run menu, Debug As > Web Application .
-
If your project is a Maven project, you can run your application in the web server inside the
Eclipse debugger by selecting the
Run
menu,
Debug As
>
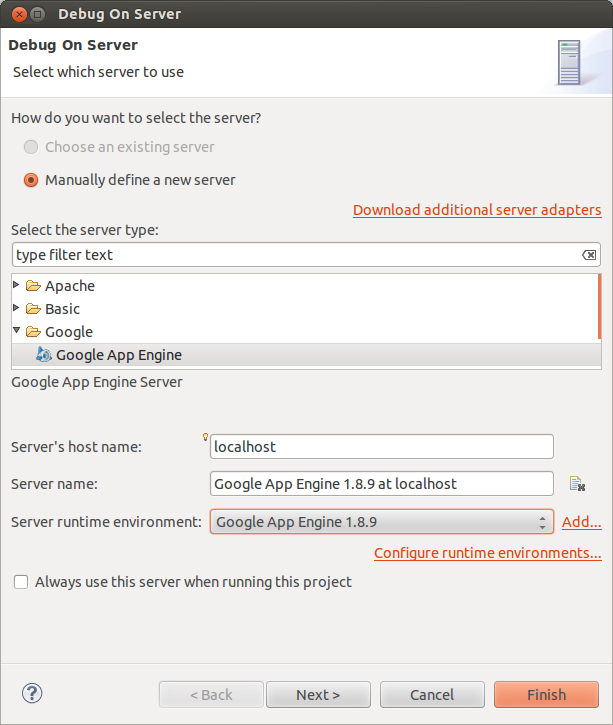
1 Debug on Server
. You will then be taken to a page where you will be asked to select a
server. The first time you run the application, you should use the
Manually define a new server
option:

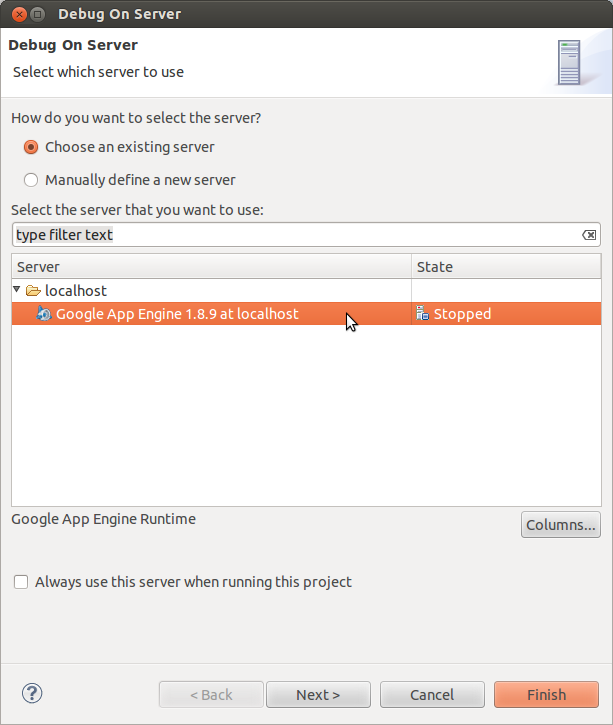
Feel free to change the server name if you like, but accept the remaining defaults and click Finish. On subsequent runs of the application, you should use the Choose an existing server option, make sure the server you defined for this application is highlighted, and click Finish :

Eclipse builds the project, switches to the Debug perspective, and the server starts. If the server starts successfully, the server displays several messages, including a message similar to the following, in the Console:
The server is running at http://localhost:8888/
If you want to customize how the server is started, you can create a new Run/Debug configuration. For a non-Maven project, create a configuration of the type "Web Application." For a Maven project, create a configuration of the type "Maven Build" by cloning and modifying the "DevAppServer" configuration.
To test the new application that the plugin created, start the server as above, then visit the following URL in your browser (using a URL path appropriate to your application):
With Eclipse, you can leave the server running in the debugger while you make changes to source
code, JSPs, static files and
appengine-web.xml
. When you save changes to source code,
Eclipse compiles the class automatically, then attempts to insert it into the running web server
dynamically. In most cases, you can simply reload the page in your browser to test the new version
of the code. Changes to JSPs, static files and
appengine-web.xml
are recognized by the
development server automatically, and also take effect without restarting the server. If you change
web.xml
or other configuration files, you must stop and start the server for the
changes to take effect.
To stop the server, make sure the
Debug
panel is selected, then click the Terminate
button:
![]()
Uploading to Google App Engine
Before you upload your app for the first time, you must register an application ID with App Engine using
the Admin Console
. Register an application ID, then edit the
appengine-web.xml
file and change the
<application>...</application>
element to contain the new ID.
To begin deployment of your application:
-
For a non-Maven application, click the Google button
 in the Eclipse toolbar, and select "Deploy to App Engine." Eclipse may prompt you
for your administrator account username (your email address) and password. Enter your account
information and click the
Upload
button to complete the upload.
-
For a Maven application, select the
Run
menu,
Run As
>
5 Maven build...
. On the Edit Configuration panel that pops up, enter
appengine:update
in the Goals field and click Run .
appengine-web.xml
file, and uploads the contents of the
war/
directory.
Test your application on App Engine by visiting its URL:
-
            http://

             your_app_id

            .appspot.com/guestbook
Running the Command Line Tools
Some features of the App Engine Java SDK tools are only available by running the tools directly from the command line. If you have installed the SDK using Eclipse, you can run these tools from the Eclipse plugin installation directory.
The SDK is located in your Eclipse installation directory, under
           plugins/com.google.appengine.eclipse.sdkbundle_

            VERSION

           /
, where
VERSION
is a version identifier for the SDK. In this directory is the
appengine-java-sdk/bin/
subdirectory containing the tools.
Note:
If you are using Mac OS X or Linux, you must give the command files executable permission before you can run them. For example, to give
appcfg.sh
executable permission, enter the following command from the
appengine-java-sdk/bin/
directory:
chmod u+x appcfg.sh
For more information on the features available exclusively from the command line, see Uploading and Managing .
