Set Up Environment
Set Up Web Starter Kit
Follow this guide to set up the Web Starter Kit. Simply pick a layout and start coding. For help building a responsive and performant site, set up the build tools.
Follow this guide to set up the Web Starter Kit. Simply pick a layout and start coding. For help building a responsive and performant site, set up the build tools.
TL;DR
To use the Web Starter Kit, simply clone the repository or download the
latest release
and build on what’s included in the
app
directory:
git clone https://github.com/google/web-starter-kit.git
$ cd web-starter-kit/app
If you’re using the Web Starter Kit tools, make sure your system has Node , Ruby , Gulp , and the Sass gem installed.
Note
Check if you already have Node installed. Bring up a terminal and type
node -v
. If Node responds, and if it shows a version at or above v0.10.x, proceed to checking if you have Ruby installed too. If you require Node, go to
NodeJS.org
and click on the big green Install button.
Bring up a terminal and type
ruby -v
. If Ruby responds, and if it shows a version number at or above 1.8.7, then type
gem --version
. If you don’t see any errors, proceed to installing the Sass gem. If you require Ruby, it can be installed from the
Ruby downloads
page.
Bring up a terminal and type
sass -v
. If Sass is installed, it should return a version number at or above 3.3.x. If you don’t see any errors, proceed to the Gulp installation. If you need to install Sass, see the command-line instructions on the
Sass installation
page.
Bring up a terminal and type
gulp -v
. If Gulp is installed it should return a version number at or above 3.5.x. If you don’t see any errors, proceed to the Gulp commands section. If you need to install Gulp, open up a terminal and type in the following:
$ sudo npm install --global gulp
This will install Gulp globally. Next, install the local dependencies Web Starter Kit requires:
$ cd web-starter-kit
$ npm install
That’s it! You should now have everything needed to use the Gulp tools in Web Starter Kit.
Pick one of these layouts in the
web-starter-kit/app
folder that most fits your needs:
| Starter File | Description |
|---|---|
| index.html | Default starting point. Includes a slide-out menu. To choose this as your starting point, remove the alternative basic.html file. |
| basic.html | Very basic starting point. No navigation. Simple, but responsive styles. To choose this as your starting point, remove the alternative index.html file. |
In the root of the project
web-starter-kit
, run the
gulp
tool to build the current project. The first time you run this tool, it creates the project directory:
web-starter-kit/dist
.
Here’s a snapshot of the project files in the
web-starter-kit/dist
directory:

From the
web-starter-kit
folder, run the
gulp serve
tool to open up a local staged version of the project (for more information on this tool, see
Track code changes and optimize
). The tool opens up the build version of your starter file,
index.html
.
Collapsed and expanded views on desktop:

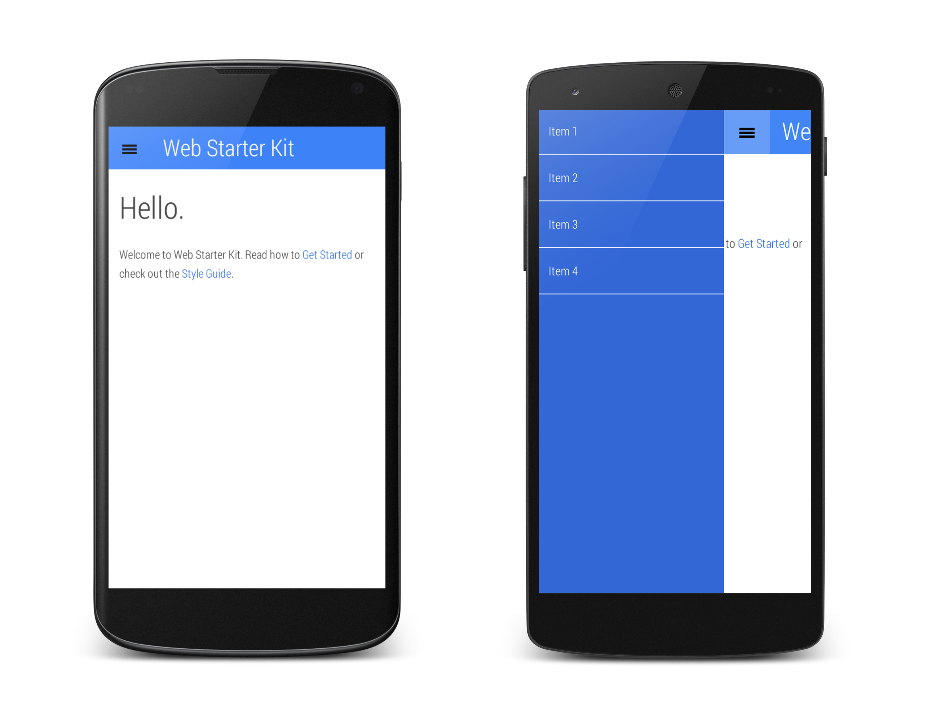
Default and expanded menu views on mobile:

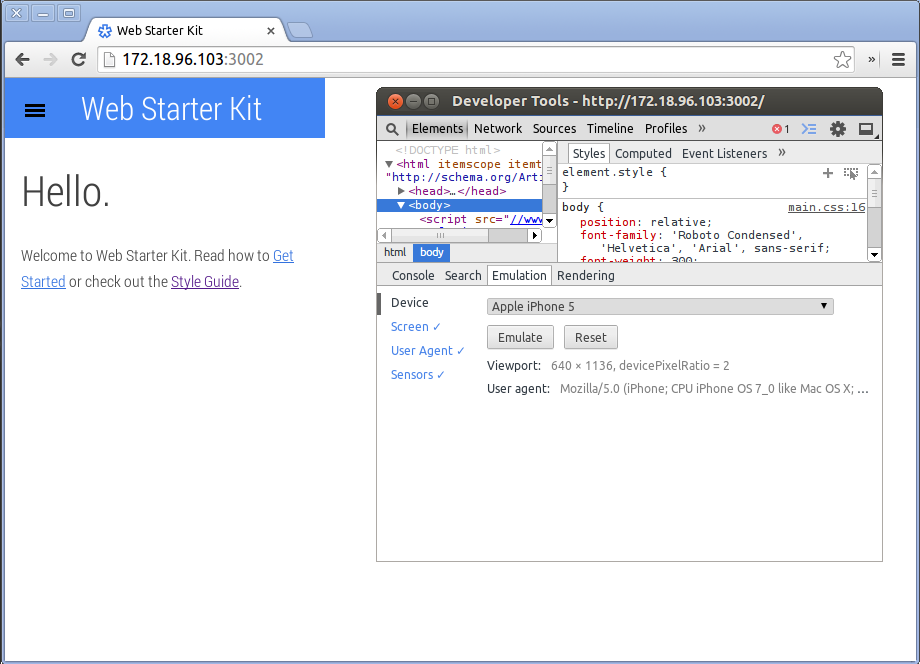
Once your site is running in a browser, open the Chrome DevTools emulation panel , select a mobile device, and emulate:

Now that you’ve set up the Web Starter Kit, try building a site .
Updated on 2014-05-29
Except as otherwise noted, the content of this page is licensed under the Creative Commons Attribution 3.0 License , and code samples are licensed under the Apache 2.0 License . For details, see our Site Policies .