Adding the Client UI
In this part of the tutorial, you'll create an
index.html
page that provides
a UI for making two simple GET requests to the backend API and displays the
results.
This is what the UI is going to look like:
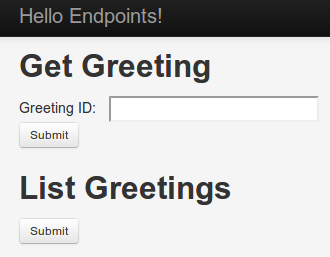
where the user specifies a Greeting and presses Submit to retrieve it, or optionally lists all the greetings from the backend API.
Adding a UI using
index.html
To add the UI:
1. Add a file named
index.html
to the
backend API project
subdirectory
src/main/webapp/
.
-
In
index.html, add the following:<!DOCTYPE html> <html> <head> <title>Hello Endpoints!</title> <script async src="/js/base.js"></script> <link rel="stylesheet" href="/bootstrap/css/bootstrap.css"> <link rel="stylesheet" href="/bootstrap/css/bootstrap-responsive.css"> <style> body { padding-top: 40px; padding-bottom: 40px; background-color: #f5f5f5; } blockquote { margin-bottom: 10px; border-left-color: #bbb; } form { margin-top: 10px; } form label { width: 90px; display: inline-block; } .form-signin input[type="text"] { font-size: 16px; height: auto; margin-bottom: 15px; padding: 7px 9px; } .row { margin-left: 0px; margin-top: 10px; overflow: scroll; } </style> </head> <body> <div class="navbar navbar-inverse navbar-fixed-top"> <div class="navbar-inner"> <div class="container"> <button type="button" class="btn btn-navbar" data-toggle="collapse" data-target=".nav-collapse"> <span class="icon-bar"></span> <span class="icon-bar"></span> <span class="icon-bar"></span> </button> <a class="brand" href="#">Hello Endpoints!</a> </div> </div> </div>where the line
<script src="/js/base.js"></script>specifies the JavaScript file we're using for this client. (We'll add the javascript file later.) -
In that same file, append the following, which adds the UI for a text field and two command buttons:
<div class="container">

    <output id="outputLog"></output>

    <form onsubmit="return false;">
        <h2>Get Greeting</h2>
        <div><label for="id">Greeting ID:</label><input id="id" /></div>
        <div><input id="getGreeting" type="submit" class="btn btn-small" value="Submit"></div>
    </form>

    <form onsubmit="return false;">
        <h2>List Greetings</h2>
        <div><input id="listGreeting" type="submit" class="btn btn-small" value="Submit"></div>
    </form>
where
idis the text field where the user specifies the desired Greeting, andgetGreetingis the button that sends the request to the backend API. ThelistGreetingbutton gets all the Greeting objects from the backend API. -
Finally, in that same file append these lines:
<script>
    function init() {
        google.appengine.samples.hello.init('//' + window.location.host + '/_ah/api');
    }
</script>
<script src="https://apis.google.com/js/client.js?onload=init"></script>
where we specify the function to be executed on page load. There is nothing special about the name
init: you can use any name you want. Just make sure you setonload=to whatever function name you use. Whatever name you give the function, and whatever tasks you perform in this function, there is one requirement for an Endpoints client: you have to load the backend API you wish to use.In the above snippet, the actual API loading is delegated to
google.appengine.samples.hello.init, which gets the URL of the backend API passed to it, as shown above. Loading the API in thegoogle.appengine.samples.hello.initfunction will be described in Adding JavaScript . -
At this point, your
index.htmlfile should look like this:<!DOCTYPE html> <html> <head> <title>Hello Endpoints!</title> <script async src="/js/base.js"></script> <link rel="stylesheet" href="/bootstrap/css/bootstrap.css"> <link rel="stylesheet" href="/bootstrap/css/bootstrap-responsive.css"> <style> body { padding-top: 40px; padding-bottom: 40px; background-color: #f5f5f5; } blockquote { margin-bottom: 10px; border-left-color: #bbb; } form { margin-top: 10px; } form label { width: 90px; display: inline-block; } .form-signin input[type="text"] { font-size: 16px; height: auto; margin-bottom: 15px; padding: 7px 9px; } .row { margin-left: 0px; margin-top: 10px; overflow: scroll; } </style> </head> <body> <div class="navbar navbar-inverse navbar-fixed-top"> <div class="navbar-inner"> <div class="container"> <button type="button" class="btn btn-navbar" data-toggle="collapse" data-target=".nav-collapse"> <span class="icon-bar"></span> <span class="icon-bar"></span> <span class="icon-bar"></span> </button> <a class="brand" href="#">Hello Endpoints!</a> </div> </div> </div> <div class="container"> <output id="outputLog"></output> <form onsubmit="return false;"> <h2>Get Greeting</h2> <div><label for="id">Greeting ID:</label><input id="id" /></div> <div><input id="getGreeting" type="submit" class="btn btn-small" value="Submit"></div> </form> <form onsubmit="return false;"> <h2>List Greetings</h2> <div><input id="listGreeting" type="submit" class="btn btn-small" value="Submit"></div> </form> <script> function init() { google.appengine.samples.hello.init('//' + window.location.host + '/_ah/api'); } </script> <script src="https://apis.google.com/js/client.js?onload=init"></script> </div> </body> </html>