This tutorial shows you how to write a simple Python program that performs basic Google Cloud Storage operations using the XML API. This document assumes you are familiar with Python and the Google Cloud Storage concepts and operations presented in the Hello Google Cloud Storage! guide.
Setting up your environment
Before starting this tutorial, you must do the following:
- Install gsutil on your computer.
-
Install the boto library and gcs-oauth2-boto-plugin.
boto is an open source Python library that is used as an interface to Google Cloud Storage. gcs-oauth2-boto-plugin is an authentication plugin for the boto auth plugin framework. It provides OAuth 2.0 credentials that can be used with Google Cloud Storage.
Setup to use the boto library and oauth2 plugin will depend on the system you are using. Use the setup examples below as guidance. These commands install pip and then use pip to install other packages. The last three commands show testing the import of the two modules to verify the installation.
Debian and Ubuntu
$ wget https://bootstrap.pypa.io/get-pip.py
$ sudo python get-pip.py
$ sudo apt-get update
$ sudo apt-get upgrade
$ sudo apt-get install gcc python-dev python-setuptools libffi-dev
$ sudo pip install virtualenv
$ virtualenv venv
$ source ./venv/bin/activate
$ (venv)pip install gcs-oauth2-boto-plugin==1.6
$ (venv)python
>>>import boto
>>>import gcs_oauth2_boto_plugin
CentOS, RHEL, and Fedora
$ wget https://bootstrap.pypa.io/get-pip.py
$ sudo python get-pip.py
$ sudo yum install gcc openssl-devel python-devel python-setuptools libffi-devel
$ sudo pip install virtualenv
$ virtualenv venv
$ source ./venv/bin/activate
$ (venv)pip install gcs-oauth2-boto-plugin==1.6
$ (venv)python
>>>import boto
>>>import gcs_oauth2_boto_plugin
-
Set up your boto configuration file to use OAuth2.0.
You can configure your boto configuration file to use service account or application credentials. For more information about credentials and authentication types, see Credential Types Supporting Various Use Cases .
Using service account credentials
-
Use an existing service account or create a new one.
Creating a service account - Go to the Google Developers Console .
- Select a project to which the service account will be associated.
- In the left sidebar, under APIs & AUTH , select Credentials .
- Click Create new Client ID .
-
In the
Create Client ID
window, choose
Service account
.

- Click Create Client ID .
-
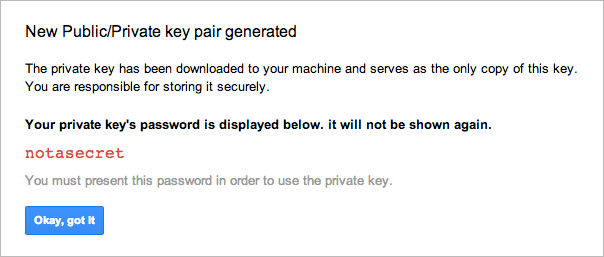
A
New Public/Private key pair generated
window is displayed and the private
key is downloaded automatically. Note the private key's password and click
Okay, got it
.
-
Configure the
.botofile with the service account. You can do this withgsutil:$ gsutil config -e
The command will prompt you for the service account email address and the location of the service account private key (.p12). Be sure to have the private key on the computer where you are running the
gsutilcommand.
Using application credentials
-
If you don't already have a
.botofile create one. You can do this withgsutil.$ gsutil config
-
Use an existing client ID for an application or create a new one.
Creating a client ID for an application - Go to the Google Developers Console .
- Select a project to which the client ID will be associated.
- In the left sidebar, under APIs & AUTH , select Credentials .
- Click Create new Client ID .
- In the Create Client ID window, choose Installed application .
-
Click
Create Client ID
.
The resulting client ID will look like the following example:
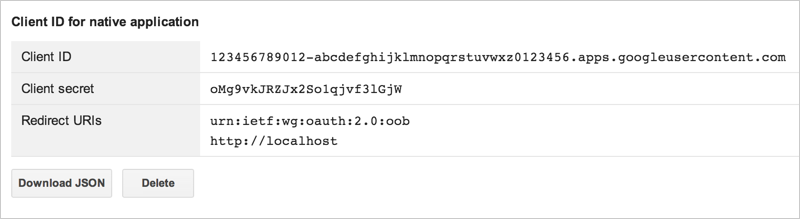
- Click Download JSON .
-
Edit the
.botofile. In the[OAuth2]section, specify theclient_idandclient_secretvalues with the ones you generated. -
Run the
gsutil configagain command to generate a refresh token based on the client ID and secret you entered. -
Configure refresh token fallback logic.
The
gcs-oauth2-boto-pluginrequires fallback logic for generating auth tokens when you are using application credentials. Fallback logic is not needed when you use a service account.You have the following options for enabling fallback:
-
Set the
client_idand theclient_secretin the.botoconfig file. This is the recommended option, and it is required for usinggsutilwith your new.botoconfig file. -
Set environment variables
OAUTH2_CLIENT_IDandOAUTH2_CLIENT_SECRET. -
Use the
SetFallbackClientIdAndSecretfunction as shown in the examples below.
-
Set the
-
Use an existing service account or create a new one.
Setting up your Python source file |
|
|
To start this tutorial, use your favorite text editor to create a new Python file. Then, add the following directives, import statements, configuration, and constant assignments shown.
Note that in the code here, we use the
|
#!/usr/bin/python import boto import gcs_oauth2_boto_plugin import os import shutil import StringIO import tempfile import time # URI scheme for Google Cloud Storage. GOOGLE_STORAGE = 'gs' # URI scheme for accessing local files. LOCAL_FILE = 'file' # Fallback logic. In https://console.developers.google.com # under Credentials, create a new client ID for an installed application. # Required only if you have not configured client ID/secret in # the .boto file or as environment variables. CLIENT_ID = 'your client id' CLIENT_SECRET = 'your client secret' gcs_oauth2_boto_plugin.SetFallbackClientIdAndSecret(CLIENT_ID, CLIENT_SECRET) |
Creating buckets |
|
|
This code creates two buckets. Because bucket names must be globally unique (see the naming guidelines ), a timestamp is appended to each bucket name to help guarantee uniqueness. If these bucket names are already in use, you'll need to modify the code to generate unique bucket names. |
now = time.time()
CATS_BUCKET = 'cats-%d' % now
DOGS_BUCKET = 'dogs-%d' % now

# Your project ID can be found at https://console.developers.google.com/
# If there is no domain for your project, then project_id = 'YOUR_PROJECT'
project_id = 'YOUR_DOMAIN:YOUR_PROJECT'

for name in (CATS_BUCKET, DOGS_BUCKET):
  # Instantiate a BucketStorageUri object.
  uri = boto.storage_uri(name, GOOGLE_STORAGE)
  # Try to create the bucket.
  try:
    # If the default project is defined,
    # you do not need the headers.
    # Just call: uri.create_bucket()
    header_values = {"x-goog-project-id": project_id}
    uri.create_bucket(headers=header_values)

    print 'Successfully created bucket "%s"' % name
  except boto.exception.StorageCreateError, e:
    print 'Failed to create bucket:', e
|
Listing buckets |
|
|
To retrieve a list of all buckets, call
|
uri = boto.storage_uri('', GOOGLE_STORAGE)
# If the default project is defined, call get_all_buckets() without arguments.
for bucket in uri.get_all_buckets(headers=header_values):
  print bucket.name
|
Uploading objects |
|
|
To upload objects, create a file object (opened for read) that points to your local file and a storage URI object that points to the destination object on Google Cloud Storage. Call the
|
# Make some temporary files.
temp_dir = tempfile.mkdtemp(prefix='googlestorage')
tempfiles = {
    'labrador.txt': 'Who wants to play fetch? Me!',
    'collie.txt': 'Timmy fell down the well!'}
for filename, contents in tempfiles.iteritems():
  with open(os.path.join(temp_dir, filename), 'w') as fh:
    fh.write(contents)

# Upload these files to DOGS_BUCKET.
for filename in tempfiles:
  with open(os.path.join(temp_dir, filename), 'r') as localfile:

    dst_uri = boto.storage_uri(
        DOGS_BUCKET + '/' + filename, GOOGLE_STORAGE)
    # The key-related functions are a consequence of boto's
    # interoperability with Amazon S3 (which employs the
    # concept of a key mapping to localfile).
    dst_uri.new_key().set_contents_from_file(localfile)
  print 'Successfully created "%s/%s"' % (
      dst_uri.bucket_name, dst_uri.object_name)

shutil.rmtree(temp_dir)  # Don't forget to clean up!
|
Listing objects |
|
|
To list all objects in a bucket, call
|
uri = boto.storage_uri(DOGS_BUCKET, GOOGLE_STORAGE) for obj in uri.get_bucket(): print '%s://%s/%s' % (uri.scheme, uri.bucket_name, obj.name) print ' "%s"' % obj.get_contents_as_string() |
Downloading and copying objects |
|
|
This code reads objects in
|
dest_dir = os.getenv('HOME')
for filename in ('collie.txt', 'labrador.txt'):
  src_uri = boto.storage_uri(
      DOGS_BUCKET + '/' + filename, GOOGLE_STORAGE)

  # Create a file-like object for holding the object contents.
  object_contents = StringIO.StringIO()

  # The unintuitively-named get_file() doesn't return the object
  # contents; instead, it actually writes the contents to
  # object_contents.
  src_uri.get_key().get_file(object_contents)

  local_dst_uri = boto.storage_uri(
      os.path.join(dest_dir, filename), LOCAL_FILE)

  bucket_dst_uri = boto.storage_uri(
      CATS_BUCKET + '/' + filename, GOOGLE_STORAGE)

  for dst_uri in (local_dst_uri, bucket_dst_uri):
    object_contents.seek(0)
    dst_uri.new_key().set_contents_from_file(object_contents)

  object_contents.close()
|
Changing object ACLs |
|
|
This code grants the specified Google account
|
uri = boto.storage_uri(DOGS_BUCKET + '/labrador.txt', GOOGLE_STORAGE)
print str(uri.get_acl())
uri.add_email_grant('FULL_CONTROL', 'valid-email-address')
print str(uri.get_acl())
|
Reading bucket and object metadata |
|
|
This code retrieves and prints the metadata associated with a bucket and an object. |
# Print ACL entries for DOGS_BUCKET.
bucket_uri = boto.storage_uri(DOGS_BUCKET, GOOGLE_STORAGE)
for entry in bucket_uri.get_bucket().get_acl().entries.entry_list:
  entry_id = entry.scope.id
  if not entry_id:
    entry_id = entry.scope.email_address
  print 'SCOPE: %s' % entry_id
  print 'PERMISSION: %s\n' % entry.permission

# Print object metadata and ACL entries.
object_uri = boto.storage_uri(DOGS_BUCKET + '/labrador.txt', GOOGLE_STORAGE)
key = object_uri.get_key()
print ' Object size:\t%s' % key.size
print ' Last mod:\t%s' % key.last_modified
print ' MIME type:\t%s' % key.content_type
print ' MD5:\t%s' % key.etag.strip('"\'') # Remove surrounding quotes
for entry in key.get_acl().entries.entry_list:
  entry_id = entry.scope.id
  if not entry_id:
    entry_id = entry.scope.email_address
  print 'SCOPE: %s' % entry_id
  print 'PERMISSION: %s\n' % entry.permission
|
Deleting objects and buckets |
|
|
To conclude this tutorial, this code deletes the objects and buckets that you have created. A bucket must be empty before it can be deleted, so its objects are first deleted. |
for bucket in (CATS_BUCKET, DOGS_BUCKET):
  uri = boto.storage_uri(bucket, GOOGLE_STORAGE)
  for obj in uri.get_bucket():
    print 'Deleting object: %s...' % obj.name
    obj.delete()
  print 'Deleting bucket: %s...' % uri.bucket_name
  uri.delete_bucket()
|