This page discusses the how to use the Database Development Perspective in Eclipse to connect to your development MySQL instances and Google Cloud SQL instances. While not required, this perspective can be useful when using an App Engine web application with Google Cloud SQL.
Contents
- Overview
- Connecting to a local database instance
- Connecting to a Cloud SQL instance
- Querying an instance
Overview
You can use the Eclipse Database Development Perspective (in the Eclipse menubar, Window > Perspective > Database Development ) to manage your DB connections, including connecting to databases to view tables and executing SQL queries from within Eclipse. You connect to local MySQL databases or remote Google Cloud SQL databases using the MySQL JDBC driver.
Note: This feature requires that the Eclipse Data Tools Platform (DTP) plugin is installed.
Connecting to a local database instance
The steps below assume you are familiar with creating a database connection in Eclipse. For more details, see Creating a Database Connection Profile in the Eclipse documentation.
To connect to a local database instance:
- Open the Database Development Perspective and create a new connection.
-
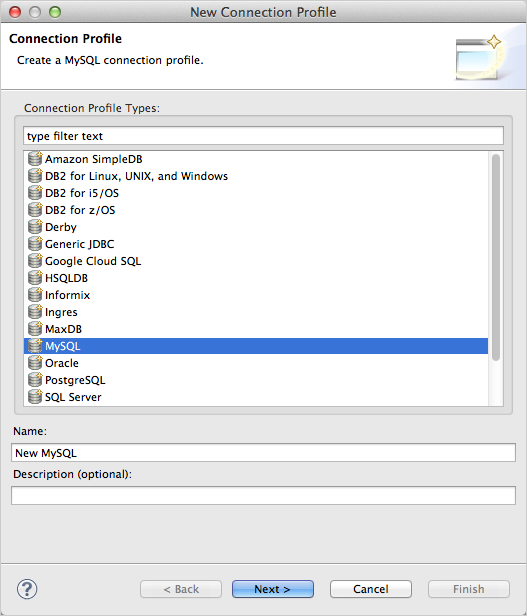
In the
New Connection Profile
dialog, select the profile type as
MySQL
and click
Next
.

-
In the
New Connection Profile
dialog, select the
MySQL JDBC Driver
.
Note: Create a new driver definition if MySQL JDBC Driver does not exist as a selection. You can do this by clicking the New Driver Definition icon to the right of the Drivers box.
-
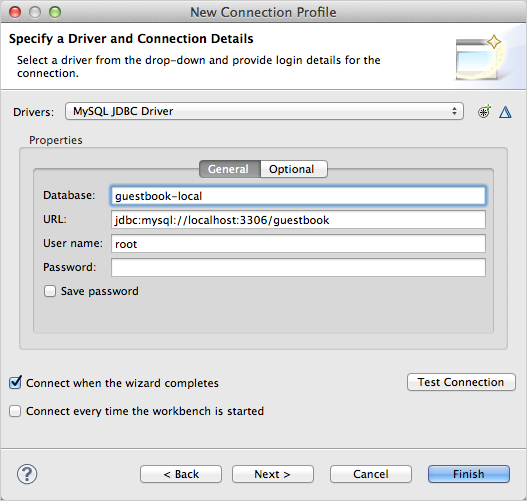
Fill out the connection profile information.
In the example below, the guestbook database is specified. Note that you do not have to specify a password because you are connecting as 'root'@'localhost' which does not require a password.

- Click Finish .
Connecting to a Cloud SQL instance
To connect to a Cloud SQL database, you can follow the same strategy as connecting to a local one, that is, you will use the MySQL JDBC driver. The differences between a local connection and a Cloud SQL are that with a Cloud SQL instance you:
- Configure your Cloud SQL instance with an IP address and authorize the IP address of the machine you are running Eclipse on, as an authorized IP address (see Configuring access control for IP connections ).
- Specify an password for the root user password. After you create a new Cloud SQL instance, you must specify the root password (see Configuring MySQL database access control ).
- Use the IP address of the Cloud SQL instance in the connection profile URL.
To connect to a Cloud SQL instance:
- Open the database development perspective and create a new connection.
- In the New Connection Profile dialog, select the profile type as MySQL and click Next .
-
In the
New Connection Profile
dialog, select the
MySQL JDBC Driver
.
Note: Create a new driver definition if MySQL JDBC Driver does not exist as a selection. You can do this by clicking the New Driver Definition icon to the right of the Drivers box.
-
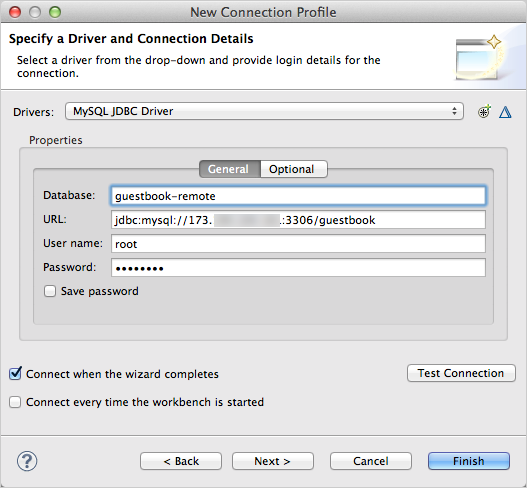
Fill out the connection profile information.
In the example below, the guestbook database in a Cloud SQL instance is specified. Note that an IP address (partially blurred) and a password are specified.

- Click Finish .
Querying an instance
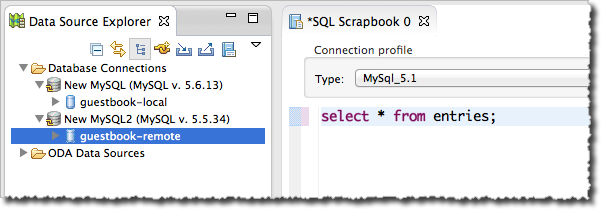
You can use the Database Development Perspective to run queries against your local and Cloud SQL database instances. In the example below, we use the SQL Scrapbook feature to quickly create and execute a SQL query.

