The instructions below describe how to get the Android sample app running with the Mobile Backend using Eclipse. A similar methodology can be used with other IDEs, such as Android Studio . If you have not already, you must first Deploy the Backend .
Setup Eclipse with Google Plugin for Eclipse (GPE) and Android Developer Toolkit (ADT)
- Download and install Eclipse 4.2 IDE for Java.
-
Install the
Google Plugin for Eclipse (GPE) 4.2
. Make sure you select the checkboxes for the following:
- Developer Tools > Android Developer Tools
- Google App Engine Tools for Android
- Google Plugin for Eclipse
- SDKs > Google App Engine Java SDK
- Contact all update sites during install to find required software
- Restart Eclipse.
-
Install the Android Developer Toolkit - select
Eclipse > Window > Android SDK Manager
to install the following:
- Android Tools package
- Android 4.0.3 and higher packages
- Google Play Services SDK . Install the latest Google Play Services SDK and import the library project into your workspace as instructed.
- Connect an Android device running Android 4.0.3 or later, or use an Android Virtual Device (AVD) with a minimum API level of 15. The virtual devices are installed with the ADT plugin and can be accessed from Window -> Android Virtual Device Manager .
Configure the Android client app to run with the deployed backend
- Download the Android client zip file (or clone from GitHub repository ) and unzip to a location of your choice.
- Import the unzipped Android project into Eclipse by selecting File > Import > Android > Existing Android Code Into Workspace and then supplying the directory you unzipped the client project.
-
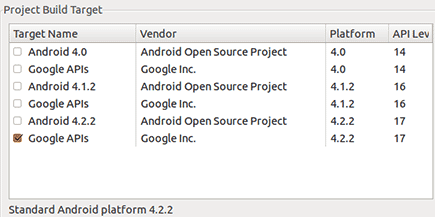
Ensure your new project is configured for a Google APIs target:
- Right click on the project in the Package Explorer view and choose Properties .
-
Select the
Android
properties. Check that the target selected is
Google APIs
and shows an API level 15 or higher. If you have a lower level API, update your Android SDK (
Window->Android SDK Manager
) and install a higher API level to build the project against.

-
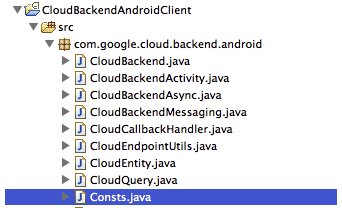
In the Android client project, locate the file
src.com.google.cloud.backend.core.Consts.javaand open it:
-
Locate the following code:
/* Set Project ID of your Google APIs Console Project.*/ public static final String PROJECT_ID = "*** ENTER YOUR PROJECT ID ***"; -
Replace
*** ENTER YOUR PROJECT ID ***with the Project ID you created when you deployed the backend (we will change other values in this file in the next tutorial). - Click Save to save your changes and build the project.
Running the Sample
- If you are using a physical Android device, make sure Development mode is enabled and the device is connected to your computer via USB.
- If you are using an AVD emulator, select Windows > Android Virtual Device Manager and start an existing device or click New to create one, then start it: let the device completely finish its startup process.
- Right-click your project selected in the Package Explorer pane, and select Run As > Android Application .
- Wait a few moments for the to be transferred onto your device.
-
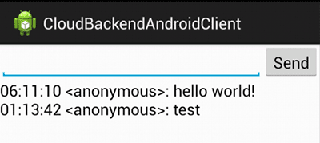
Start the client app, then enter some text into it and click Send. The sent message will be echoed with a timestamp:

-
View the message in the
DataStore
using App Engine’s DataStore viewer. To do this:
- Return to the Cloud Console for your project.
- Click Cloud Datastore in the list of services available to your backend.
- Click Query .
-
In the
Kind
pulldown menu, select Guestbook and click
Run Query
. All of your messages are shown in the returned list:

The sample guestbook app is now running and connected to the backend.
Next
Enable push messaging so other clients are notified of new messsages.
