The Mobile Backend uses the authentication mechanism provided by Google Cloud Endpoints where users must sign in to their Google accounts prior to using your app. By using authentication the Mobile Backend can enable you to send messages to specific users, or keep objects private to a user across all of their devices.
These instructions assume that you have:
The Mobile Backend frees you from writing code to juggle tokens to keep your application secure. These instructions guide you through creating the necessary tokens and storing them on the Backend and the device in the following steps:
- Create a web client ID.
- Create an Android client ID.
- Set both client IDs in the text boxes provided in the Mobile Backend configuration page.
-
Set the web client ID in the appropriate location in
com.google.cloud.backend.core.Consts.java.
Create a Web Client ID
- Visit the Google Developers console .
- Click Click the name of your mobile backend project.
- Click APIs & Auth .
- Click Credentials .
- Click Create a new client ID (or Create another client ID if you have already created a client ID for this project).
- Enter a Product Name in the Create Client ID .
- Select web application for Application type .
-
Enter your backend URL in the
Authorized JavaScript origins
textbox, e.g.
http://www.your-project-id.appspot.com, replacingyour-project-idwith the Project ID you chose earlier. -
Click
Create client ID
. The Web application client ID is displayed in the console, where it is stored. You'll need to copy this ID to the proper locations in the Mobile Backend config page and in the Android client
Consts.javafile.
Create an Android Client ID
In order to create the Android client ID, you'll need to have the SHA1 fingerprint of the key you are using. The ADT plugin that you already installed automatically creates a debug keystore and a debug key that you can use for testing purposes (You must use a release key for your release version!). These instructions assume you are using the debug key. The debug keystore password is
android
, and the key alias is
androiddebugkey
.
-
Invoke the following command in a terminal window to obtain the SHA1 fingerprint from your keystore:
keytool -exportcert -alias androiddebugkey -keystore ~/.android/debug.keystore -v -list -
Enter the value
androidwhen prompted for a keystore password, for debug . -
Copy the SHA fingerprint key that is displayed after your run the above
keytoolcommand. You will enter this when you generate the Android client ID. - Visit the Google Developers console and navigate to Credentials for your app, as in the previous section.
- Click Create a new client ID .
- Select Installed application the application type, and Android for the installed application type in the Create Client ID dialog.
-
Enter your Android application package name (which for this example is
com.google.cloud.backend) in the textbox labeled Package name . You can find the package under<manifest>inAndroidManifest.xml. - Enter the SHA1 fingerprint that you just obtained from your keystore key in the textbox labeled Signing certificate fingerprint .
- Click Create client ID .
- Inside the box labeled Client ID for installed applications, make sure that the Application type listed is Android , then locate the value to the right of Client ID . This is the value you need to add in the Mobile Backend config page. This value is stored in the console, so you can always revisit it.
Set the Client IDs in the Mobile Backend
To configure the Mobile Backend for Auth using Client IDs:
-
Open the Mobile Backend settings page
https://<your-project-id>.appspot.com/in your browser. - Select Secured by Client IDs under Authentication/Authorization.
- In the Android Client ID textbox, enter the Android client ID that you created in the previous section.
- In the Web Client ID textbox, enter the Web client ID that you created in the previous section.
- Click Save .
Set the Client ID in the Android Client
To configure the Android client to be authenticated to the Mobile Backend:
-
In the Android client project, locate the file
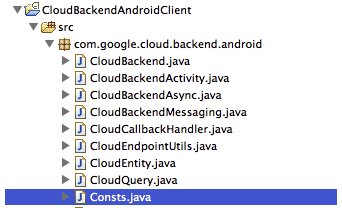
src.com.google.cloud.backend.core.Consts.javaand open it:
-
Locate the lines:
/** * Set your Web Client ID for authentication at backend. */ public static final String WEB_CLIENT_ID = "*** ENTER YOUR WEB CLIENT ID ***"; -
Replace
*** ENTER YOUR WEB CLIENT ID ***with the web client ID you created. -
Locate the lines:
/* Set default user authentication enabled or disabled. */ public static final boolean IS_AUTH_ENABLED = false; -
Update the value from
falsetotrue. - Save the project and run it again.
- Run the client on your physical Android (remember, emulators won't work using auth), you will see the account picker. Select the account you use for the Mobile Backend.
- Send a message, and now notice that your user name is now displayed in the message.
This completes the setup for the Mobile Backend sample app.
